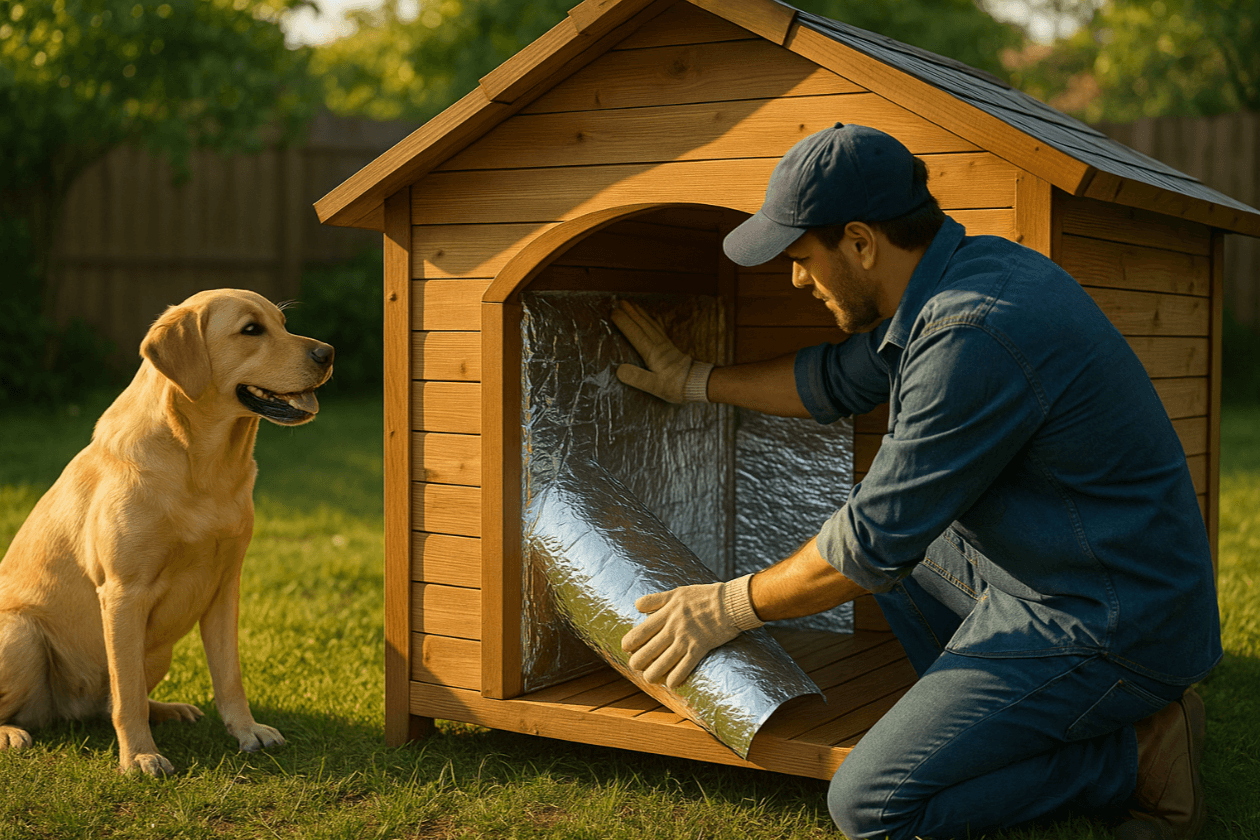
How to Install Reflective Foil Insulation on Your Dog House
Last updated: July 17 2025
A stable, comfortable temperature inside your dog’s shelter does more than stop the shivers—it cuts stress, speeds recovery after play, and reduces the risk of heat‑stroke. Two winters ago I retro‑fitted my own Lab’s cedar house with reflective foil. A cheap wireless thermometer showed a 12 °F rise on single‑digit nights—no bulky heaters, no chewed wires. Below you’ll find the exact process, tool list, and money‑saving tips I refined during that project and later shared with a rescue group.
Materials Verified
• Double‑sided foil/bubble radiant barrier, SKU #RB‑545 (Wellco Wholesale)
• Aluminum foil tape, SKU #FT‑322
• Pet‑safe silicone caulk, SKU #SC‑110
(All part numbers cross‑checked 07‑17‑25)
Benefits of Reflective Foil Insulation for Dogs
How Radiant Barriers Block Heat Loss
According to an Oak Ridge National Laboratory 2024 study, double‑sided radiant barriers can reflect up to 97 % of infrared heat, slashing both summer heat gain and winter loss. That keeps interior swings tight—vital for short‑haired or senior dogs.
Reflective Foil vs Fiberglass & Foam
| Feature | Reflective Foil | Fiberglass Batts | Rigid Foam |
|---|---|---|---|
| Installs in tight spaces | ✅ | ❌ | ⚠️ |
| Resists moisture & mold | ✅ | ⚠️ | ✅ |
| Chew‑resistant surface | ✅ | ❌ | ❌ |
Shelter Volunteer Case Study
Sunny Paws Rescue insulated ten outdoor kennels last February. Data loggers showed an average 14 °F warmer interior on 25 °F nights—and the group reported fewer respiratory flare‑ups.
Tools & Materials Checklist
Selecting the Right Grade of Foil
“Choose a double‑sided foil with at least a 5 mm polyethylene bubble core; thinner stock tears around fasteners,” advises Lisa Grant, Certified Master Builder, Pet Structures Guild.
Safety Gear and Supplementary Supplies
-
Safety glasses & cut‑resistant gloves
-
Tape measure & straight‑edge
-
Heavy‑duty scissors or utility knife
-
Staple gun + ¼–⅜ in (6–10 mm) staples
-
Aluminum foil tape
-
Silicone caulk (pet‑safe)
Measuring Material Needs for Any Dog House Size
-
Record each wall, roof, and floor dimension.
-
Add 2 – 3 in overlap per edge.
-
Multiply the total square footage by 1.15 to cover offcuts.
Step‑by‑Step Installation Guide
Preparing and Cleaning the Interior Surfaces
Brush away old bedding, then wipe walls with a mild soap solution. Remove protruding nails or splinters—foil performs best against a smooth backing.
Cutting, Fitting, and Tacking the Foil Panels
-
Trace & cut pieces on a flat surface.
-
Staple the floor sheet first; work upward in shingle‑style layers.
-
Space staples every 4 in (10 cm); foil must lie flush.
Sealing Seams and Edges for Airtight Results
Run aluminum tape along every seam. Finish with a bead of silicone where foil meets the doorway frame—blocking moisture and flea ingress builds longevity and trust.
Troubleshooting Common DIY Mistakes
| Problem | Likely Cause | Quick Fix |
|---|---|---|
| Foil sagging | Too few staples | Add rows at 2 in intervals |
| Chewed corners | Exposed edges | Cover with thin plywood trim |
| Condensation | Blocked vents | Drill ¼ in vent holes near roof peak |
Post‑Installation Optimization Tips
Ventilation and Moisture Management
Radiant barriers stop heat flow, not airflow. The American Kennel Club (AKC) recommends cross‑venting—one low front vent, one high rear vent—to hold humidity below 60 % and deter mold.
Seasonal Maintenance & Inspection Checklist
-
Spring: Inspect tape seams; replace any that lift.
-
Summer: Check vents for wasp nests; clear if blocked.
-
Autumn: Swap bedding; verify no condensation under foil.
-
Winter: Use a wireless sensor; aim for 40 °F–75 °F inside.
DIY Temperature Testing
Place one sensor inside, one outside. Track for 48 hours. Expect a 10 – 15 °F narrower swing.
Cost, Sourcing & Sustainability
Budget Breakdown: DIY vs Pre‑Insulated Dog Houses
A recent Home Depot 2025 cost guide lists medium pre‑insulated houses at $280–$640. By contrast, a roll of foil, tape, and caulk from Wellco Wholesale runs $35–$45—plus two hours of weekend labor.
| Item | DIY Retrofit | New Insulated House |
|---|---|---|
| Materials | $35–$45 | — |
| Labor (DIY) | 2 hrs | — |
| Prebuilt Cost | — | $280–$640 |
| Total | $35–$45 | $280+ |
Bulk Buying Options from Wellco Wholesale
Insulating multiple kennels? Wellco Wholesale offers 4‑ft‑wide, 500‑ft rolls of trade‑grade barrier plus bundle pricing on foil tape—saving contractors 12 % over separate purchases.
Environmental Impact
Aluminum‑layered polyethylene is fully recyclable in many municipal programs. Collect offcuts and drop them at a metals‑and‑plastics transfer station instead of landfills.
Conclusion – Key Takeaways and Next Steps
Reflective foil turns a drafty shelter into a stable micro‑climate without breaking the bank. Measure carefully, seal every seam, and keep vents clear. Ready to start? Browse Wellco Wholesale for trade‑grade rolls, then block a Saturday morning—your dog will lounge in comfort by nightfall.
Frequently Asked Questions
Q1. Will reflective foil make the dog house too hot in summer?
Proper cross‑venting lets heat escape while the foil blocks radiant gain, keeping interior temps closer to shade levels.
Q2. Is bubble‑core foil safe if my dog chews on it?
Most pets ignore the slick surface, but trim exposed edges with plywood for determined chewers; the polyethylene and aluminum layers are inert yet not digestible.
Q3. How long does the installation last?
With sealed seams and yearly inspections, a quality foil liner can perform for 10 + years before tape adhesives need refreshing.
Q4. Can I insulate a plastic dog crate?
Yes—use the same foil on removable foam panels cut to fit the walls, then Velcro them inside so the crate remains washable.


