5 Common Mistakes to Avoid with Sound Absorbing Hanging Acoustic Panels
Open‑plan offices, restaurants, and home studios often struggle with reverberation and speech intelligibility. In fact, 63 % of employees say workplace noise hurts their concentration. Sound absorbing hanging acoustic panels—also called suspended acoustic baffles—offer a simple, budget‑friendly fix. Yet many projects underperform because of a handful of preventable errors. This guide highlights the five most common mistakes and shows you how to avoid them.
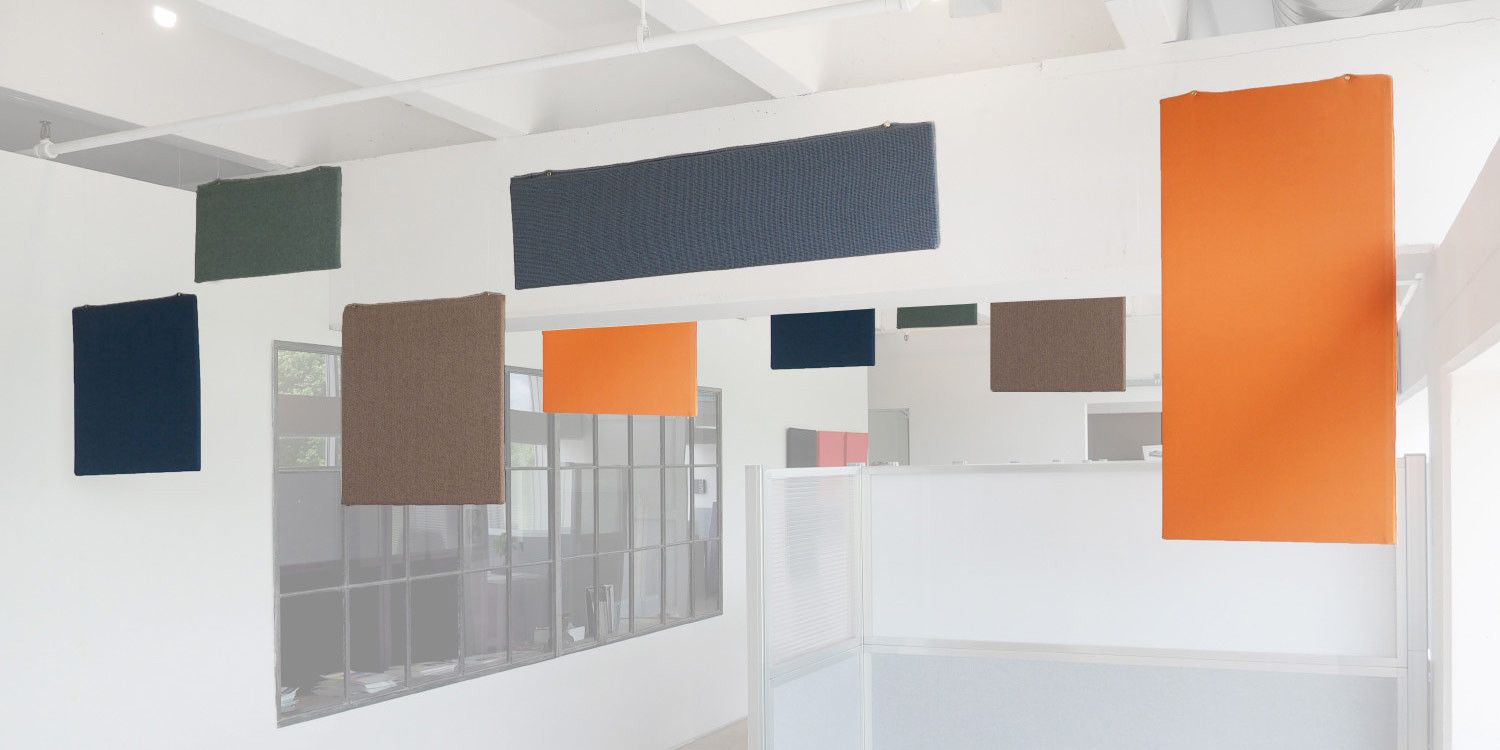
Mistake 1 – Treating Panels as Décor, Not Acoustic Tools
Sound absorbing hanging acoustic panels certainly come in eye‑catching shapes and colors, but aesthetic appeal can’t replace acoustic science.
What goes wrong
-
Teams order panels based on color palettes alone.
-
Marketing photos drive decisions instead of room acoustics data.
Better approach
-
Start with a room analysis. Use a free reverberation calculator or hire an acoustic consultant to determine target RT60.
-
Match material to need. Look for panels with an NRC (Noise Reduction Coefficient) of 0.70–1.00 for offices; higher (≥ 0.90) for music studios.
-
Balance looks and performance. Many manufacturers offer fabric wraps, printed graphics, and beveled edges without sacrificing absorption.
Mistake 2 – Ignoring Placement and Height Guidelines
Putting panels “where they fit” often means they end up too high, too low, or clustered in one spot.
Key rules
-
Hang panels 12–18 inches (30–45 cm) below the ceiling to create an air gap that boosts low‑frequency absorption.
-
Stagger rows rather than lining them up; this breaks up flutter echoes.
-
Target first‑reflection zones: above desks, seating clusters, or mixing positions in a studio.
-
In rooms with high ceilings, install multiple tiers to address vertical reflections.
Quick check: If you clap once and hear a “ping” or metallic ring, spacing and coverage are insufficient.
Mistake 3 – Choosing the Wrong Panel Density or NRC Rating
Not all acoustic panels are equal. A stylish 3 mm PET felt panel looks sleek but barely affects lower‑mid frequencies.
How to choose wisely
-
Density matters: 3–6 lb/ft³ (48–96 kg/m³) mineral wool or fiberglass cores absorb broadly.
-
Thickness counts:
-
1 in / 25 mm: good down to ~500 Hz
-
2 in / 50 mm: good down to ~250 Hz
-
4 in / 100 mm: reaches ~125 Hz—ideal for home theaters.
-
-
Verify lab data: Look for ASTM C423 or ISO 354 test reports, not generic “up to 90 % absorption” claims.
“Treat NRC like SPF: the higher the number, the better the protection—‑but only if applied correctly.”
— Dr. Mei Chen, Acoustical Society of America fellow
Mistake 4 – Overlooking Air Gaps, Lighting, and HVAC Fixtures
Even perfectly specified panels can fall short if mechanical details are ignored.
Common oversights & fixes
| Oversight | Impact | Fix |
|---|---|---|
| Panels flush to ceiling | Loses low‑frequency absorption | Use cable kits or 2‑point clips to create an air cavity |
| Blocking sprinklers or diffusers | Violates fire code, disrupts airflow | Map ceiling services before layout |
| Shadows over task areas | Glare and uneven lighting | Integrate linear LEDs between panel rows |
| Incompatible hanging hardware | Sagging panels, safety risks | Use manufacturer‑supplied brackets rated for panel weight |
Mistake 5 – Forgetting Ongoing Maintenance and Fire Safety
After installation, panels tend to be “out of sight, out of mind,” leading to dust buildup and code issues.
Best practices
-
Quarterly dusting or vacuuming keeps fibers porous and panels looking fresh.
-
Annual visual inspection for sagging cables or damaged edges.
-
Check fire classification (ASTM E84 Class A or EN 13501‑1 B‑s1,d0). Never spray aftermarket fabric scotch‑guard that could negate the rating.
-
Document the installation: keep spec sheets and certificates on file for insurers and inspectors.
Conclusion & Call to Action
Sound absorbing hanging acoustic panels can slash reverberation times and make speech crystal‑clear—but only if you avoid these five pitfalls. Start with accurate acoustic targets, respect placement science, select the right materials, coordinate with building services, and commit to routine maintenance.
Ready to optimize your space? Share your biggest acoustic headache in the comments, or reach out for a free room analysis checklist. If this guide helped, spread the word on LinkedIn or X—your network (and their ears) will thank you!