How to Install Reflective Roll Insulation: A Step-by-Step Guide for Maximum Efficiency
Reflective roll insulation is an excellent solution for homeowners looking to improve the energy efficiency of their homes. By reflecting radiant heat away in the summer and retaining warmth during the winter, this type of insulation helps regulate indoor temperatures year-round. Not only can it lead to significant savings on energy bills, but it also contributes to a more environmentally friendly home by reducing overall energy consumption.
In this article, we will walk you through the entire process of installing reflective roll insulation, offering a clear, step-by-step guide that ensures maximum efficiency. Whether you’re a DIY enthusiast or simply looking to enhance your home's insulation, this guide will equip you with all the necessary knowledge to get the job done effectively.
What is Reflective Roll Insulation?
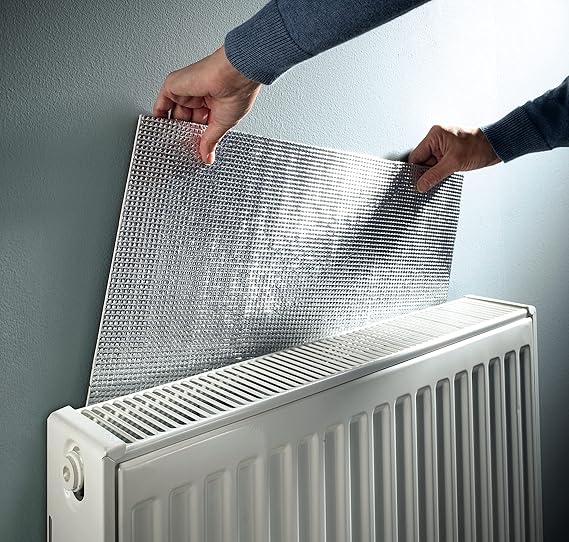
Reflective roll insulation is a type of insulation material designed to block radiant heat transfer. Unlike traditional insulation materials that rely on trapping air, reflective insulation works by reflecting heat, making it especially effective in environments where radiant heat plays a significant role, such as attics and roofs. The reflective surface, typically made of aluminum foil, reflects up to 97% of radiant heat, providing an additional layer of defense against heat gain in summer and heat loss in winter.
This type of insulation is often used in places with high exposure to the sun, such as attics, basements, and crawl spaces. Its flexible nature makes it easy to install in large spaces or narrow areas that are difficult to access. Additionally, it can be combined with other insulation types to maximize efficiency and further reduce energy costs.
Benefits of Installing Reflective Roll Insulation
Installing reflective roll insulation offers numerous benefits, making it a valuable addition to any home. Here are some of the key advantages:
-
Improved Energy Efficiency: Reflective roll insulation helps to significantly reduce heating and cooling costs by reflecting heat away in the summer and retaining warmth during the colder months. This ensures your home remains at a comfortable temperature, reducing the workload on your HVAC system and lowering energy consumption.
-
Enhanced Indoor Comfort: With better temperature control, your home will feel more comfortable year-round. In the summer, reflective insulation helps keep your living space cooler by reflecting the sun’s heat, while in the winter, it acts as a barrier to prevent heat from escaping.
-
Cost-Effective: Compared to other forms of insulation, reflective roll insulation is relatively affordable and easy to install, which makes it an appealing option for homeowners looking to improve insulation without breaking the bank. It is also long-lasting and requires little maintenance, adding to its cost-effectiveness.
-
Environmentally Friendly: By reducing the amount of energy required to heat and cool your home, reflective insulation helps lower your carbon footprint. It’s a small change that can have a significant impact on the environment by decreasing energy demand and greenhouse gas emissions.
Tools and Materials Needed for Installation
Before you begin the installation of reflective roll insulation, it’s essential to gather the right tools and materials. Here’s a list of what you’ll need:
- Reflective Roll Insulation: Ensure you have the right amount of insulation for the area you’ll be covering.
- Utility Knife or Insulation Cutter: For cutting the insulation to size.
- Measuring Tape: To measure the dimensions of the area.
- Adhesive Tape or Fasteners: For securing the insulation to surfaces and sealing seams.
- Safety Gear: Gloves, safety goggles, and a dust mask to protect yourself from particles and sharp edges.
- Staple Gun (Optional): For securing the insulation in place, particularly in attics or walls.
These tools will make the installation process smoother and ensure the insulation is installed correctly.
Step-by-Step Guide to Installing Reflective Roll Insulation
Now that you have your tools and materials, let's dive into the step-by-step installation process.
1. Prepare the Space
Before you begin, clear the installation area of any dust, debris, or obstructions. Make sure the surface is clean and dry, as this will ensure that the insulation adheres properly and performs optimally. If you are installing insulation in the attic, check for any leaks or damaged areas that might need repair before continuing.
2. Measure and Cut the Insulation
Using a measuring tape, determine the dimensions of the area where you will install the insulation. Be sure to measure accurately to avoid wastage. Once measured, use a utility knife or insulation cutter to cut the reflective roll insulation to the correct size. Always cut slightly larger than your measurements to ensure a snug fit.
3. Install the Insulation
With the insulation cut to size, begin attaching it to the desired surface. If you are insulating walls or an attic, you can use a staple gun or adhesive tape to secure the insulation in place. Start from one corner and work your way across the surface, ensuring the reflective side is facing the correct direction (towards the heat source).
4. Seal the Seams
Once the insulation is in place, use adhesive tape to seal any seams or gaps between pieces of insulation. Properly sealing these gaps will prevent air from leaking through and will maximize the insulation's effectiveness.
5. Final Inspection
After the insulation is installed and sealed, inspect the area to ensure there are no missed spots or gaps. Double-check that all seams are tightly sealed, and that the insulation is firmly secured in place.
6. Safety Tips
During installation, wear safety gear such as gloves and goggles to protect yourself from sharp edges and dust. Be mindful of any electrical wiring or fixtures in the area and avoid covering ventilation spaces.
Common Mistakes to Avoid During Installation
When installing reflective roll insulation, it's important to avoid the following mistakes:
-
Improper Surface Preparation: If the surface isn’t cleaned and dried before installation, the insulation may not adhere properly, reducing its effectiveness.
-
Inaccurate Measurements: Incorrect measurements can lead to poorly fitted insulation, which results in gaps where heat can escape.
-
Failure to Seal Seams: Not sealing the seams tightly can allow air to flow through gaps, undermining the insulation’s ability to block radiant heat.
-
Ignoring Safety Precautions: Always wear protective gear to prevent injury and avoid working near exposed electrical wires without the proper safety precautions.
Maintenance Tips for Reflective Roll Insulation
After installation, it’s essential to maintain the insulation to ensure it continues to perform effectively over time. Here are some tips for proper maintenance:
-
Regular Inspections: Periodically check the insulation for any signs of wear, tears, or moisture damage. Address any issues as soon as possible to prevent further damage.
-
Reinforce Seams: Over time, adhesive tape can weaken. Inspect seams regularly and apply new tape if needed to maintain a proper seal.
-
Upgrades and Repairs: If your insulation shows signs of significant damage or if you notice a decline in energy efficiency, consider upgrading or adding additional layers of insulation.
Conclusion and Call to Action
Installing reflective roll insulation is a simple yet highly effective way to enhance your home's energy efficiency. By following this step-by-step guide, you can ensure proper installation, helping you save on energy costs while keeping your home comfortable year-round. With the added benefit of easy maintenance and longevity, reflective roll insulation is a smart investment for any homeowner.
If you're ready to improve your home's insulation, follow these steps to get started today. For those who prefer professional assistance, consider contacting a local insulation expert to ensure maximum efficiency and quality results.